

Learn how to grow these plants from kitchen scraps. Check out the article we found over at Healthy Holistic Living.
I love composting all the kitchen scraps I can but when I fill up my compost bin or run low on some vegetables in the garden, using kitchen scraps to grow plants is a great activity. I love using kitchen scraps to start new plants as a fun gardening activity with my son. Every day, we check to see how the plants are progressing. It’s a great way to come full circle on produce we buy at the market together and cook together. Starting your own plants from kitchen scraps is really easy for a gardening nerd like me!
If you are going to attempt this, I suggest making sure the scraps you start with are good quality, I like to use organic produce grown locally when I start plants from kitchen scraps.
Growing Leeks, Spring Onions, Scallions ,and Fennel
You could go out and buy some vegetables specifically for growing but I like to wait until I actually have a need for them in my cooking. With all 5 of these examples, you will use the end of the vegetable with the white roots.
Take the left over white roots and place them in a container with a small amount of water in it. You want the roots to be wet but you don’t want the entire root submerged. Take your container and place it in a sunny window sill. I’ve actually grown green onion scraps in a fairly shady window on the north side of our house, so your success may vary. I like keeping some in a window in the kitchen for my morning eggs, and in my office for snacking on (my wife loves kissing me after that). Within 3-5 days, you will begin to see new growth come up. Remove the produce as you need and leave the roots in the water to continually harvest your kitchen scrap crops. You should refresh the water weekly to keep the plant healthy.
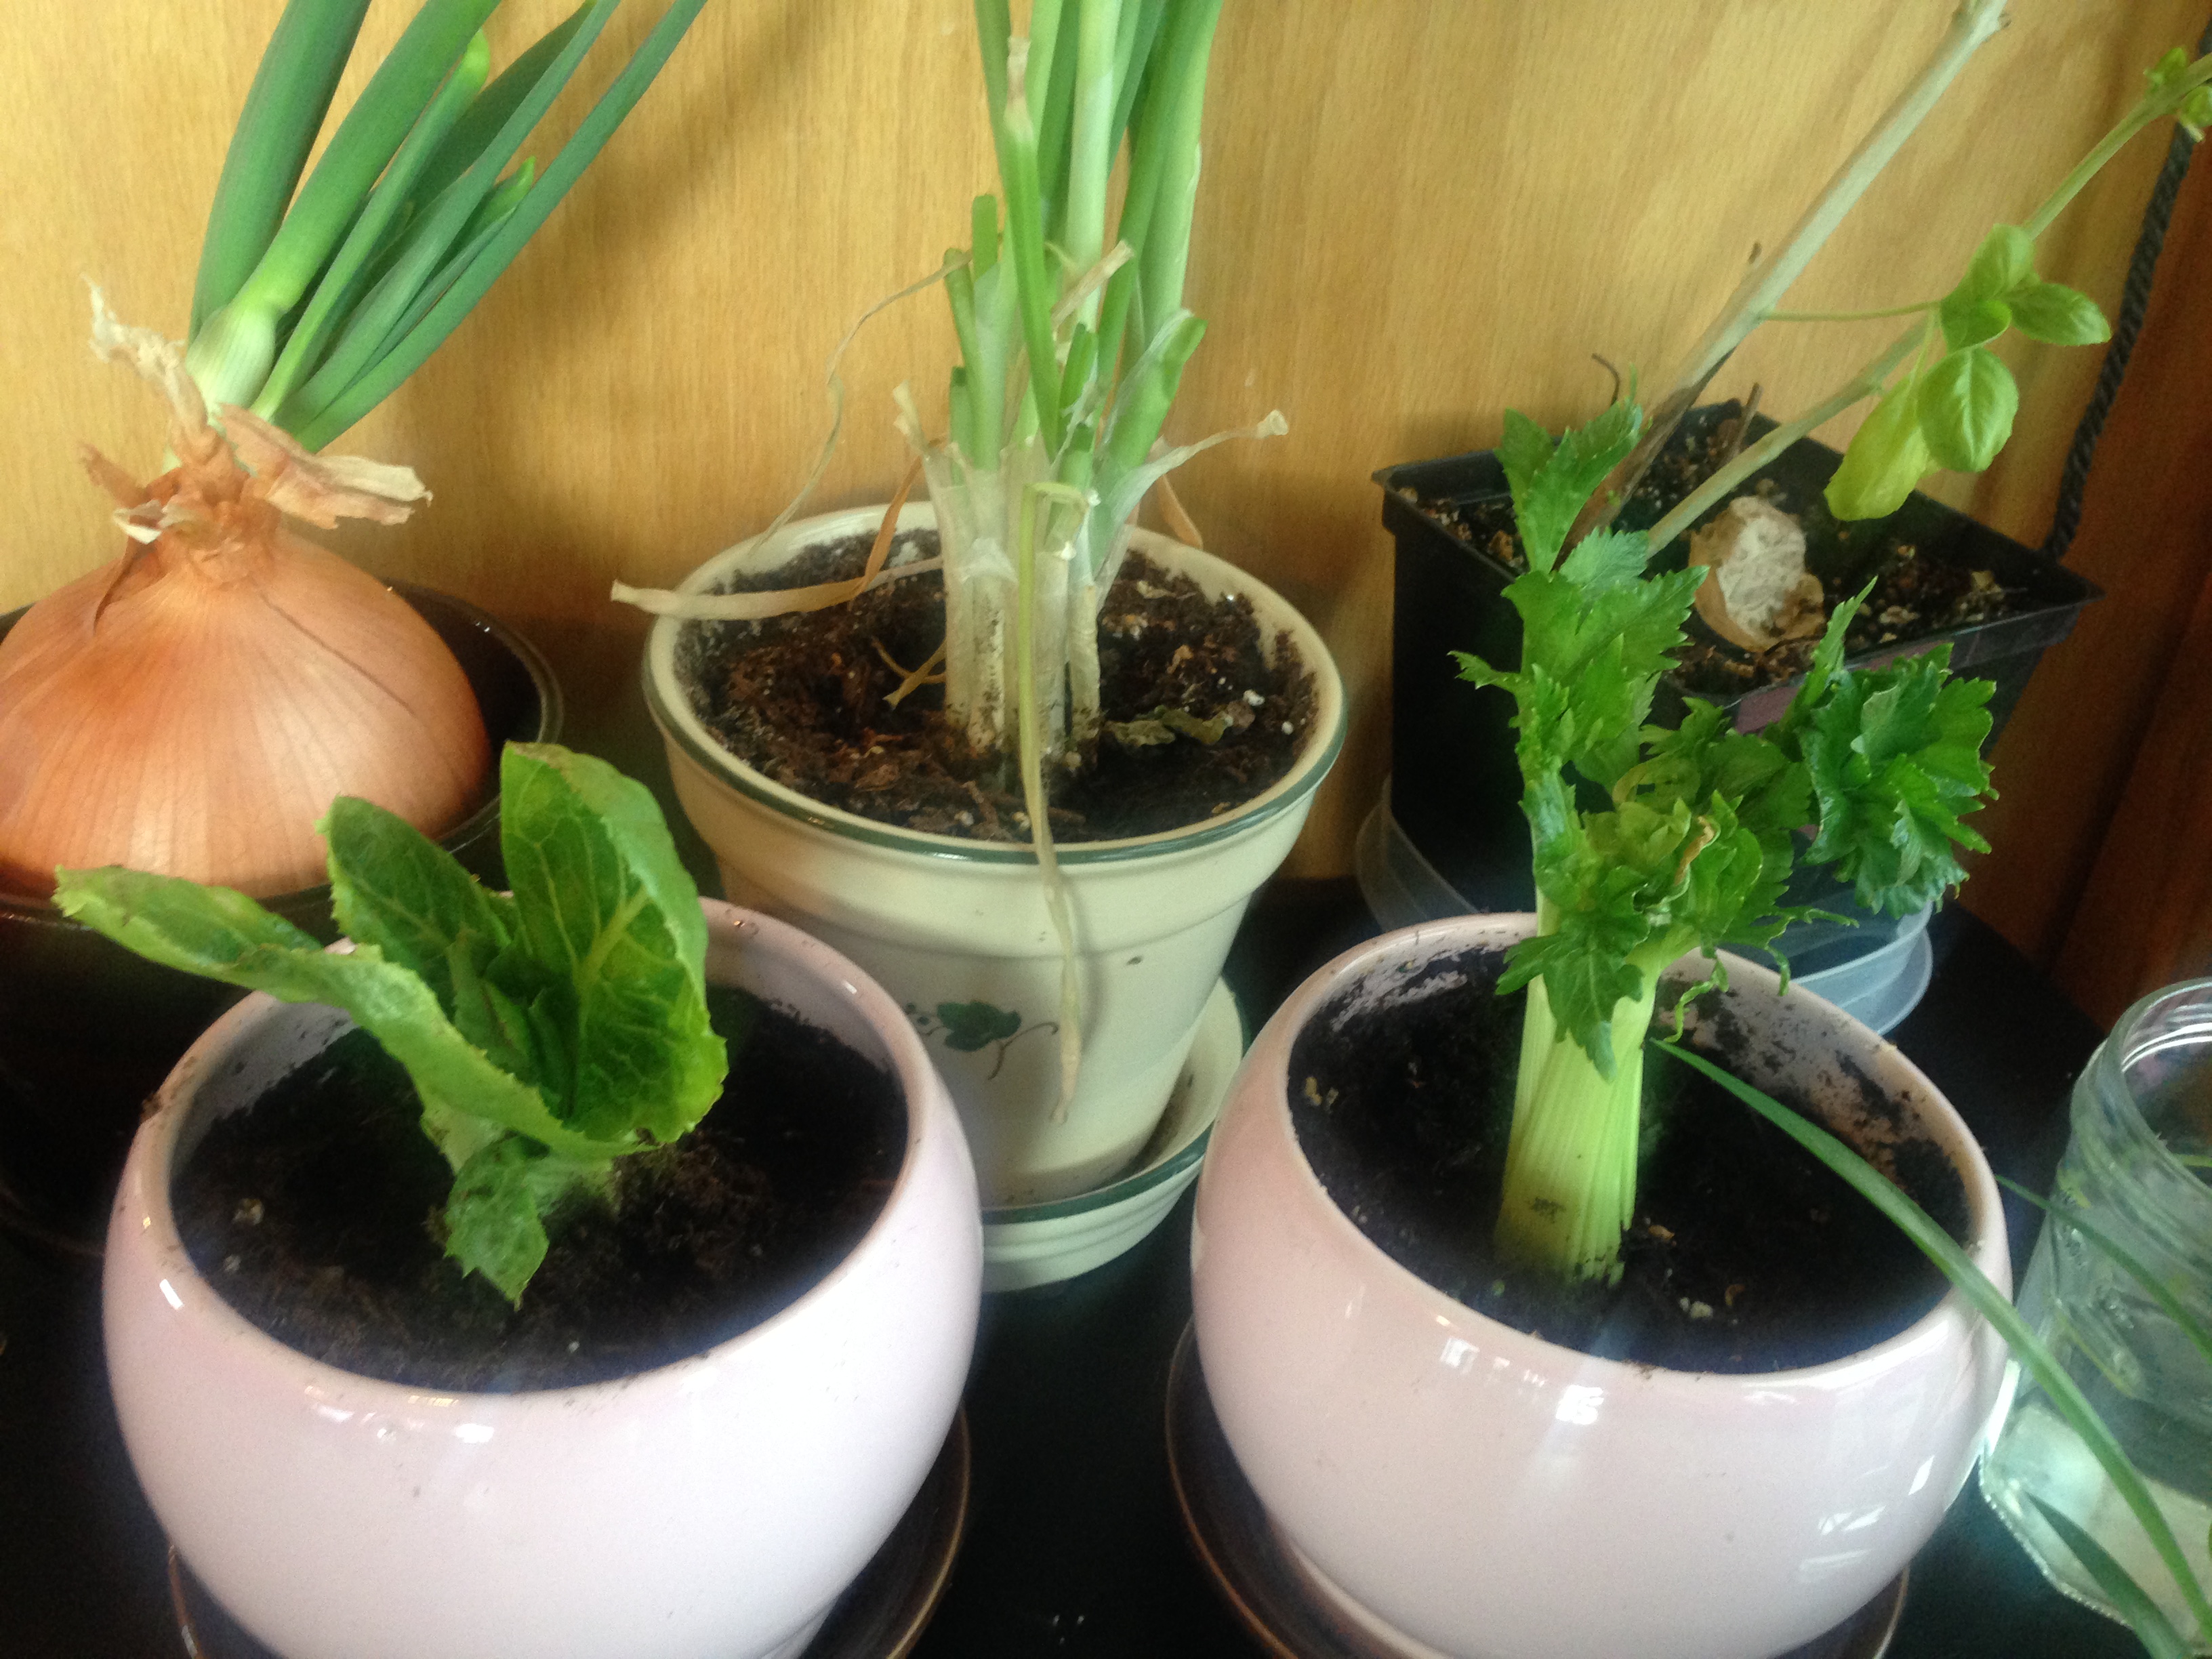
Growing Romaine Lettuce, Celery, Bok Choy & Cabbage
Just like the scallions, you will take the white roots of these vegetables to grow your produce. By cutting of the stalks or leafs with an inch or more and placing them into a bowl of water with the roots facing down, you will be on your way. You want to make sure the roots are in water but you don’t want to submerge the entire plant. Make sure to place the bowl near a sunny window and spritz it with water weekly to keep the top of the plant moist.
Several days later, you will begin to see the roots and leaves sprouting. 7 to 10 days in, remove the plant from the water and plant it into soil with only the leaves above the soil. Your plant will continue to grow and in several weeks, you will have a new head ready to be harvested.
If you want a different way to go with your plant, you can try planting directly into the soil, skipping the water staging step from before. Keeping the soil from drying out will be very important that first week.
Growing Garlic
You only need a single clove to regrow an entire garlic plant. Just place the end with the root down into the soil. Place your container in a warm part of your home with direct sunlight, then sit back and wait for the garlic to root itself and begin to send up new shoots. After the garlic becomes established in the soil, cut back the shoots and the plant will begin to put all its resources into growing a big delicious garlic bulb. Just like the ginger above, once you harvest your produce, you can repeat this process and run through the cycle again.
Growing Onions
With onions you’re going to use the root end you cut off when prepping to cook your onions. Onions are great because of the ease to propagate. You want to try to keep half an inch of onion above the roots. You will want to take your cutting and place it into your soil in a sunny place and cover the top with topsoil. Keeping your soil moist will be very important while the onion begins to establish itself. If you’re in the northeast like myself, you will want to keep the onion indoors in a container during the winter.
Growing Mushrooms
For the most part I’ve focused on plants that are pretty easy to grow, but propagating mushrooms was not included in that. If you’re going to try to propagate mushrooms, you’ll be competing with the other fungi space. Mushroom spores enjoy warm humidity and nutrient rich soil. Cooler temperatures will give your mushrooms a higher likelihood of success against other fungi.
You want to grow mushrooms in a pot. Trying to grow them in your garden will create too much competition from other mushrooms. Growing mushrooms inside of a container allow you to mow the container around and provide different conditions for the mushrooms, which will help them propagate faster. I’ve experience the greatest success by providing a warm filtered light during the day and cool temperatures at night.
To get your mushrooms to propagate, take off the head and place the stalk into your topsoil, making sure to expose the top to the air. If you have the right conditions for your mushroom, you will have a new head grow from your base. You should have some very clear feedback if your mushroom has taken or not very quickly.
Next Article: How To Safely Clean Your Fruits & Vegetables
Read full article: 17 Plants You Grow from Kitchen Scraps


Leanne Tobin-Martina
Jan 14. 2016
Heather Martina
Elsie Dack
Jan 14. 2016
splendid idea! Id like that year if possible Thanks for sharing
Merilyn Jackson
Jan 14. 2016
You and Your Health