

Here are some bread recipes that will make you to never buy bread again. Check out the article we found over at Common Sense Homesteading.
When I asked on the Common Sense Homesteading Facebook page if people were interested in bread recipes, I got a resounding, “Yes!” So I’ve rounded up some of my favorite bread recipes, plus some from my friends, to give you enough options that you should never have to buy bread again. The first section has a number of yeast bread recipes using wheat flour, the second section has bread recipes for special diets including gluten free breads, a kombucha sourdough and a bread recipe that uses soaked or sprouted whole wheat flour. Ditch all the nasty ingredients in store breads, save yourself some money and enjoy some really good bread!
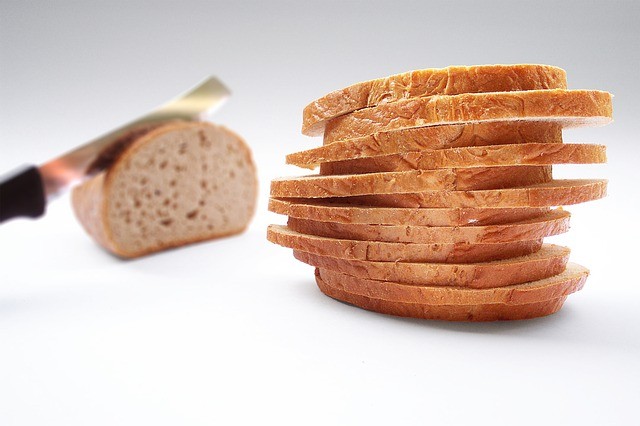
Homemade Yeast Bread Recipes
Note: I use SAF-INSTANT yeast, which does not require proofing (activating the yeast in warm liquid). You can substitute bread machine yeast or active dry yeast. Active dry yeast will need to be dissolved in the warm liquid before adding the rest of the ingredients, and you will need a little bit more active dry yeast.
Basic Sourdough Bread (from Cultures for Health)
- 2 1/3 cups Fresh Sourdough Starter
- 3 1/3 cup Flour
- 1 – 1 ½ cup Water (approximate)
- Scant Tablespoon Salt
Mix sourdough starter, flour and salt together. Use enough water to make bread dough (a moist dough is preferable to a dry dough). Knead dough until it passes the “window pane test” (a small piece of dough will stretch between four fingers thin enough to allow light to pass through without breaking). Shape the dough into a loaf . Place in a pan, proofing basket or on a board. Cover lightly with a towel and allow the dough to rise for 4-24 hours. If desired, a short (4-12 hours) proofing period can be used and the dough can be punched down, reshaped and allowed to rise a second time but a second proofing period is not required.
Slice an X shape in the top of the loaf with a very sharp knife or razor blade. Bake at 400 degrees until the internal temperature reaches 210 degrees (use a meat thermometer inserted into the bottom or side of the loaf). Bake 30-60 minutes (depending on loaf size). Allow the bread to cool before slicing.
I made up my dough in my Bosch mixer
. (After killing three bread machines, I decided to invest in something sturdier.) It took over half an hour of kneading to get a nice “window pane” dough. For my first loaf, I did a single rise after mixing. I eyed up the volume of dough that this recipe produced and decided to shape it into a single loaf and allow it to rise on a cookie sheet. Instead of an “x” on top, I made two parallel slices. This is important, as it gives the bread room to expand in the oven. The loaf grew up HUGE! (You can see it took up most of a cookie sheet.) Inside, the texture was smooth and firm. The crust was appropriately chewy, but not tough, and it had a very mild sour flavor.
My youngest complained that it “tasted too much like store bread” (translation – all white flour is not normal for us). So the next time I fed my starter, I have it half fresh ground hard white wheat berries and half bread flour. When I mixed the dough, I used the same ratios. This time I divided the dough in two parts and placed it in bread pans.
These loaves rose beautifully, too (and my youngest approved of the flavor). I made sourdough biscuits for supper tonight, and the boys approved of those, too.
Duncan’s “Meat in a Loaf” recipe
Enough raw bread dough to make two loaves of bread (you can use the recipe forHomemade Buns, or your own favorite recipe)
Leftover meat sauce, 1 to 1 1/2 cup per loaf
Shredded cheese, about one cup per loaf
For this post, I made two different types of loaves, one beef and one chicken. I combined the leftover beef spaghetti sauce with cheddar cheese, and the leftover cooked chicken Alfredo sauce with some mozzarella.
To form the loaves, roll the dough into a rectangle about 9″x13″. Spread your fillings down the center third of the dough, meat first, then cheese on top. Stay about one inch away from the narrow ends of the rectangle. Fold both sides of the dough in towards the center, pinch to seal (think “closing a purse” not “rolling a jelly roll”). You want to end up with a long, narrow loaf. Place loaves side by side on a large baking sheet
that has been greased or covered with reusable parchment paper
.
Allow to rise until about double in size. When dough is almost ready to bake, preheat oven to 350F. Bake loaves 30-35 minutes, until evenly browned. Cool 10 minutes before slicing and serving. Best served warm.
Potato Bread Recipe Using Real Mashed Potatoes
- 7 ounces cooked potato (you can use leftover mashed potatoes, or cook up a small potato and mash it)
- Water, enough to equal 1 3/4 cup when combined with the potato
(I put the potato into a 2 cup pyrex measuring cup
, and add water to bring the level up to 1 3/4 cup)
- 2 tablespoons softened butter
- 2 1/2 tablespoons sugar (or honey)
- 1 teaspoon sea salt
- 3 1/2 cups bread flour (I usually use a mix of fresh ground wheat flour and pre-milled flour)
- 2 teaspoons dry yeast or 1 1/2 teaspoons saf-instant yeast
If using a bread machine, select “wheat”, “sweet”, or “white” setting, do not use a timer.
I normally mix the dough in my Bosch Universal Plus Kitchen Machine
I add everything into the machine and mix for 6-8 minutes, adding additional flour if needed. Add the last of flour slowly – you want a soft, elastic dough. Too much flour will give you a harder dough and a drier bread. If kneading by hand, mix wet ingredients with yeast until thoroughly blended, then add dry ingredients, adjusting flour as needed to give a soft, elastic dough. This dough will be a little bit more sticky than many bread doughs. This is normal. If you look closely, you can see little bits of brightly colored blue potato.
Let bread rest and rise for around 20 minutes, then punch down and allow to rise again. (This develops the flavor and gluten of the bread.)
Once doubled in size, form dough into loaves and place in greased bread pans. A single recipe makes one large loaf or two smaller loaves. I usually divide the dough into two 9×5 pans, or make a double batch (shown here) and divide it into three regular loaves. When I bake, I like to make more than one loaf so I can keep the extras in the freezer to have on hand when needed.
Preheat oven to 350F. Bake for 25-30 minutes, until golden brown. Remove from pans and cool on wire racks. Try to wait for the bread to cool before cutting, if possible. When you cut open a steaming loaf of bread, much of the moisture escapes as steam, leaving the remainder of the loaf dry. Of course, if it all disappears within a matter of minutes, this is a non-issue. I let this batch rise a bit too much, which is why the finished loaves (shown below) don’t look quite so picture perfect. Remember, bread will rise a bit in the oven, so bake before it is overflowing the pans. (And don’t get involved in another project and forget about your bread…)
This recipe produces a moist, dense loaf that is great for sandwiches and toast, and holds for the better part of a week. For longer storage, it freezes very well, in case you want to make a double or triple batch.
I hope your family enjoys this recipe as much as my family does. If you do, please pass it along.
Next Article: Grain Free Bread Made With Coconut Flour
Read full article: 13 Homemade Bread Recipes – Never Buy Bread Again


Recent Comments